Putting Greens That Play
Like the Real Thing
Connect with verified putting-green installers in your area — from small practice greens to full short-game builds
Choose the Right Way to Build Your Putting Green
Most homeowners choose professional installation for the best results and lowest risk. Premium DIY kits are available for experienced, hands-on builders who want to take on the work themselves.
Featured Installers
Connect with verified professionals in your area
Elevate Design and Build LLC (EDB
Corey Billings
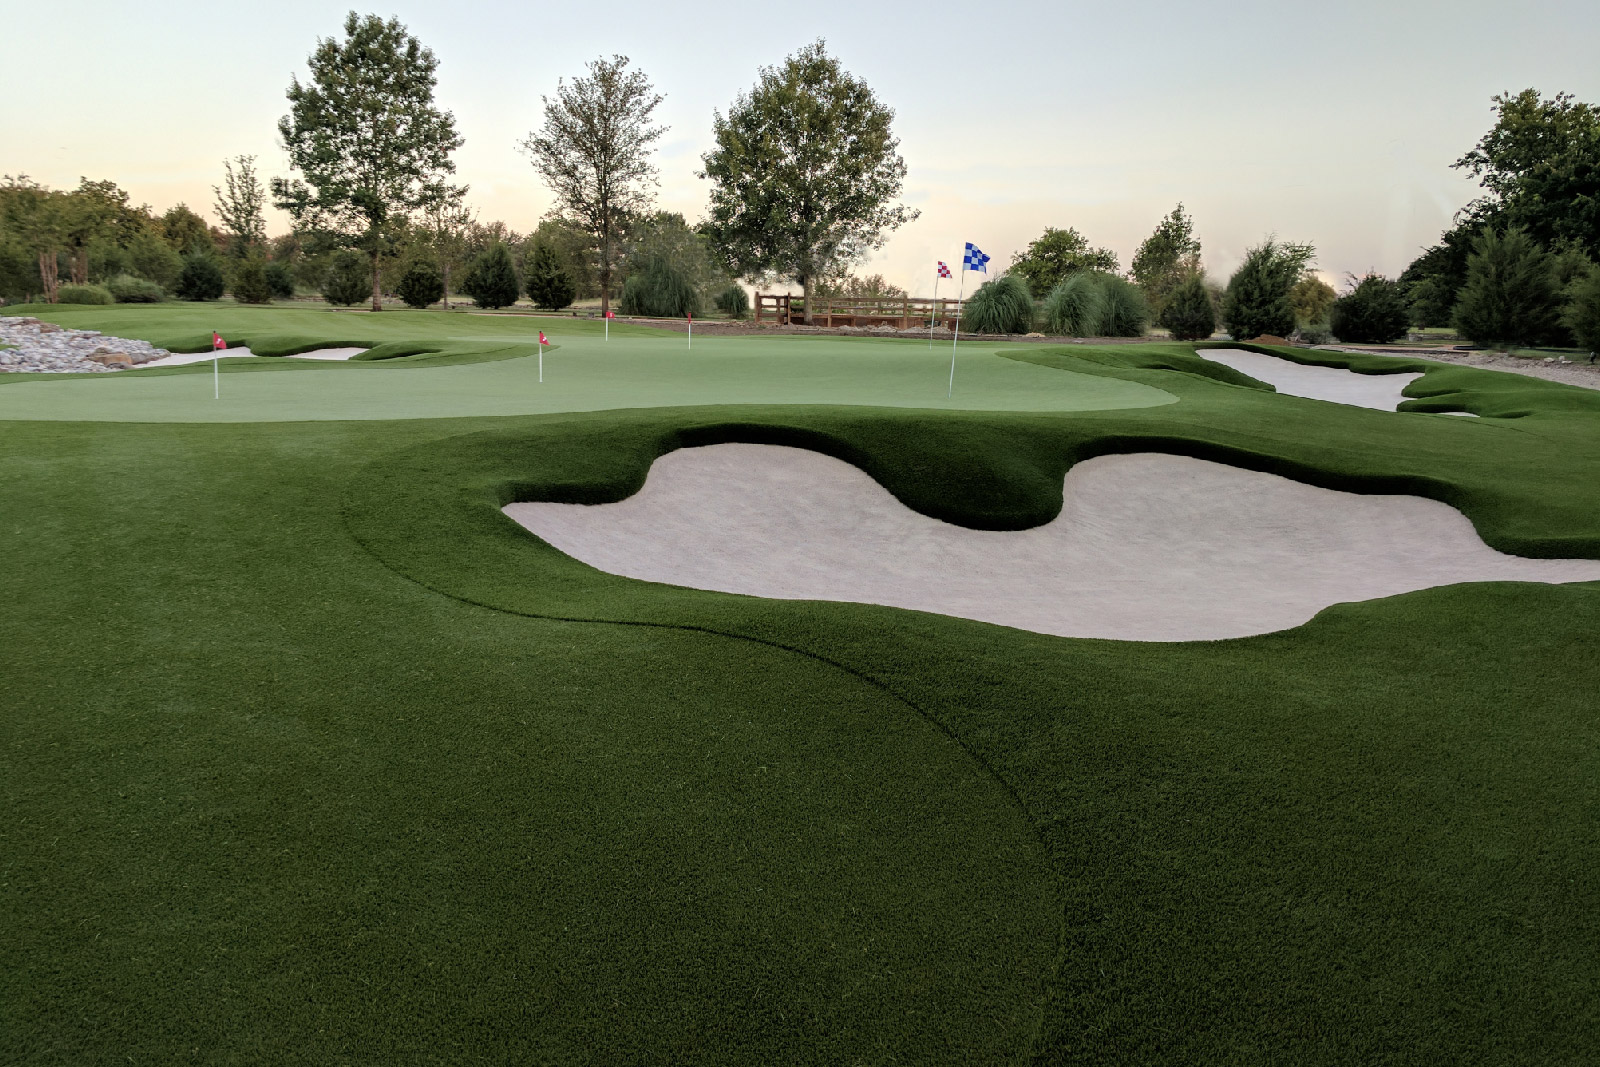
Corey Billings (EDB) is a Master golf shaper who cut his teeth in Phoenix—the proving ground of synthetic greens. Golf-course shaping since 2005; synthetic turf since 2016. Pro-level contouring, drainage-first design, seamless landscape tie-ins, and bunkers built with precision. Quality-first, detail-obsessed, and unfazed on site: “Anything can look good if you tie it in correctly.”
About PuttingGreen.com
We connect homeowners and golfers with verified putting green installers to build high-quality practice greens — from small backyard setups to full short-game facilities.
For experienced, hands-on builders, premium DIY kits are also available. Our goal is to make choosing the right path simple, transparent, and trusted.
Premium DIY Option
Best for experienced, hands-on builders. Results depend heavily on proper base prep and installation.
Professional-grade putting green kits built using the same materials and installation methods we use in the field. These kits are not pre-cut or beginner DIY projects. They are designed for contractors, installers, and experienced builders who want a complete putting green system shipped directly to the site.
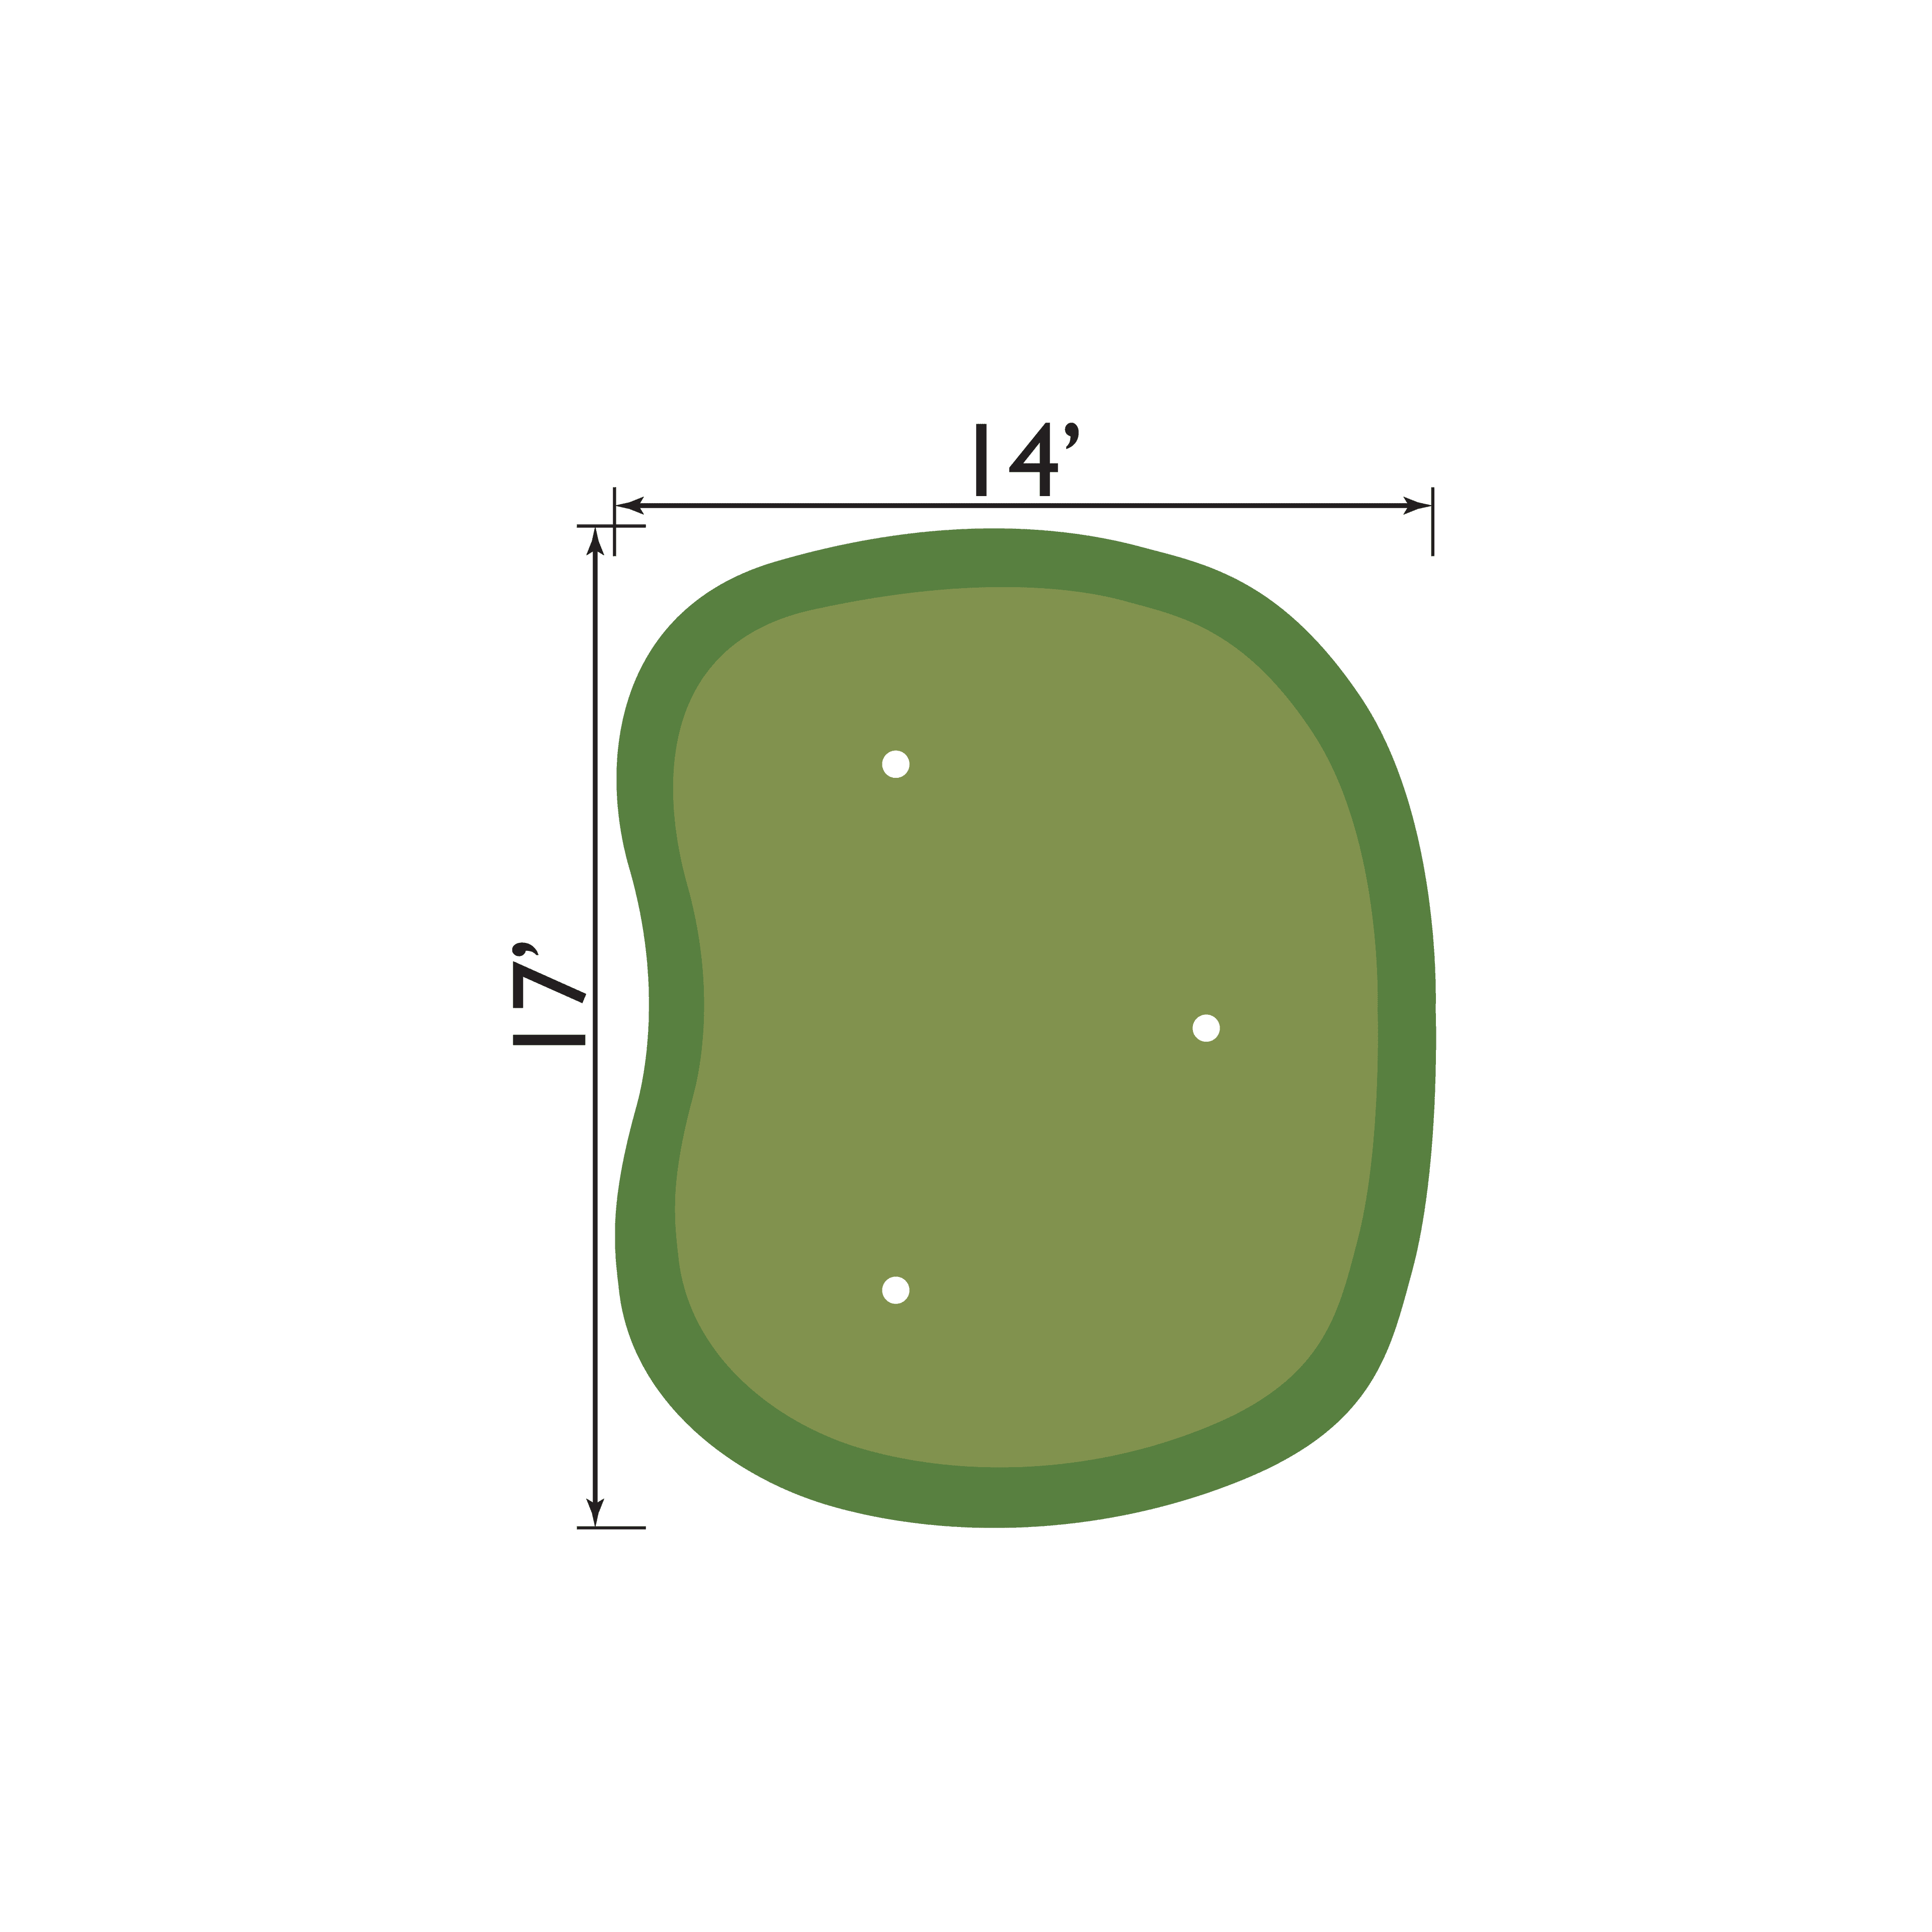
Small Practice Green
A compact putting green designed for tight spaces while still delivering professional-grade performance. This kit is well-suited for experienced builders looking for a simpler footprint without sacrificing material quality. While the putting surface is seam-free, proper base preparation, turf handling, and attention to detail are still required for a successful installation.
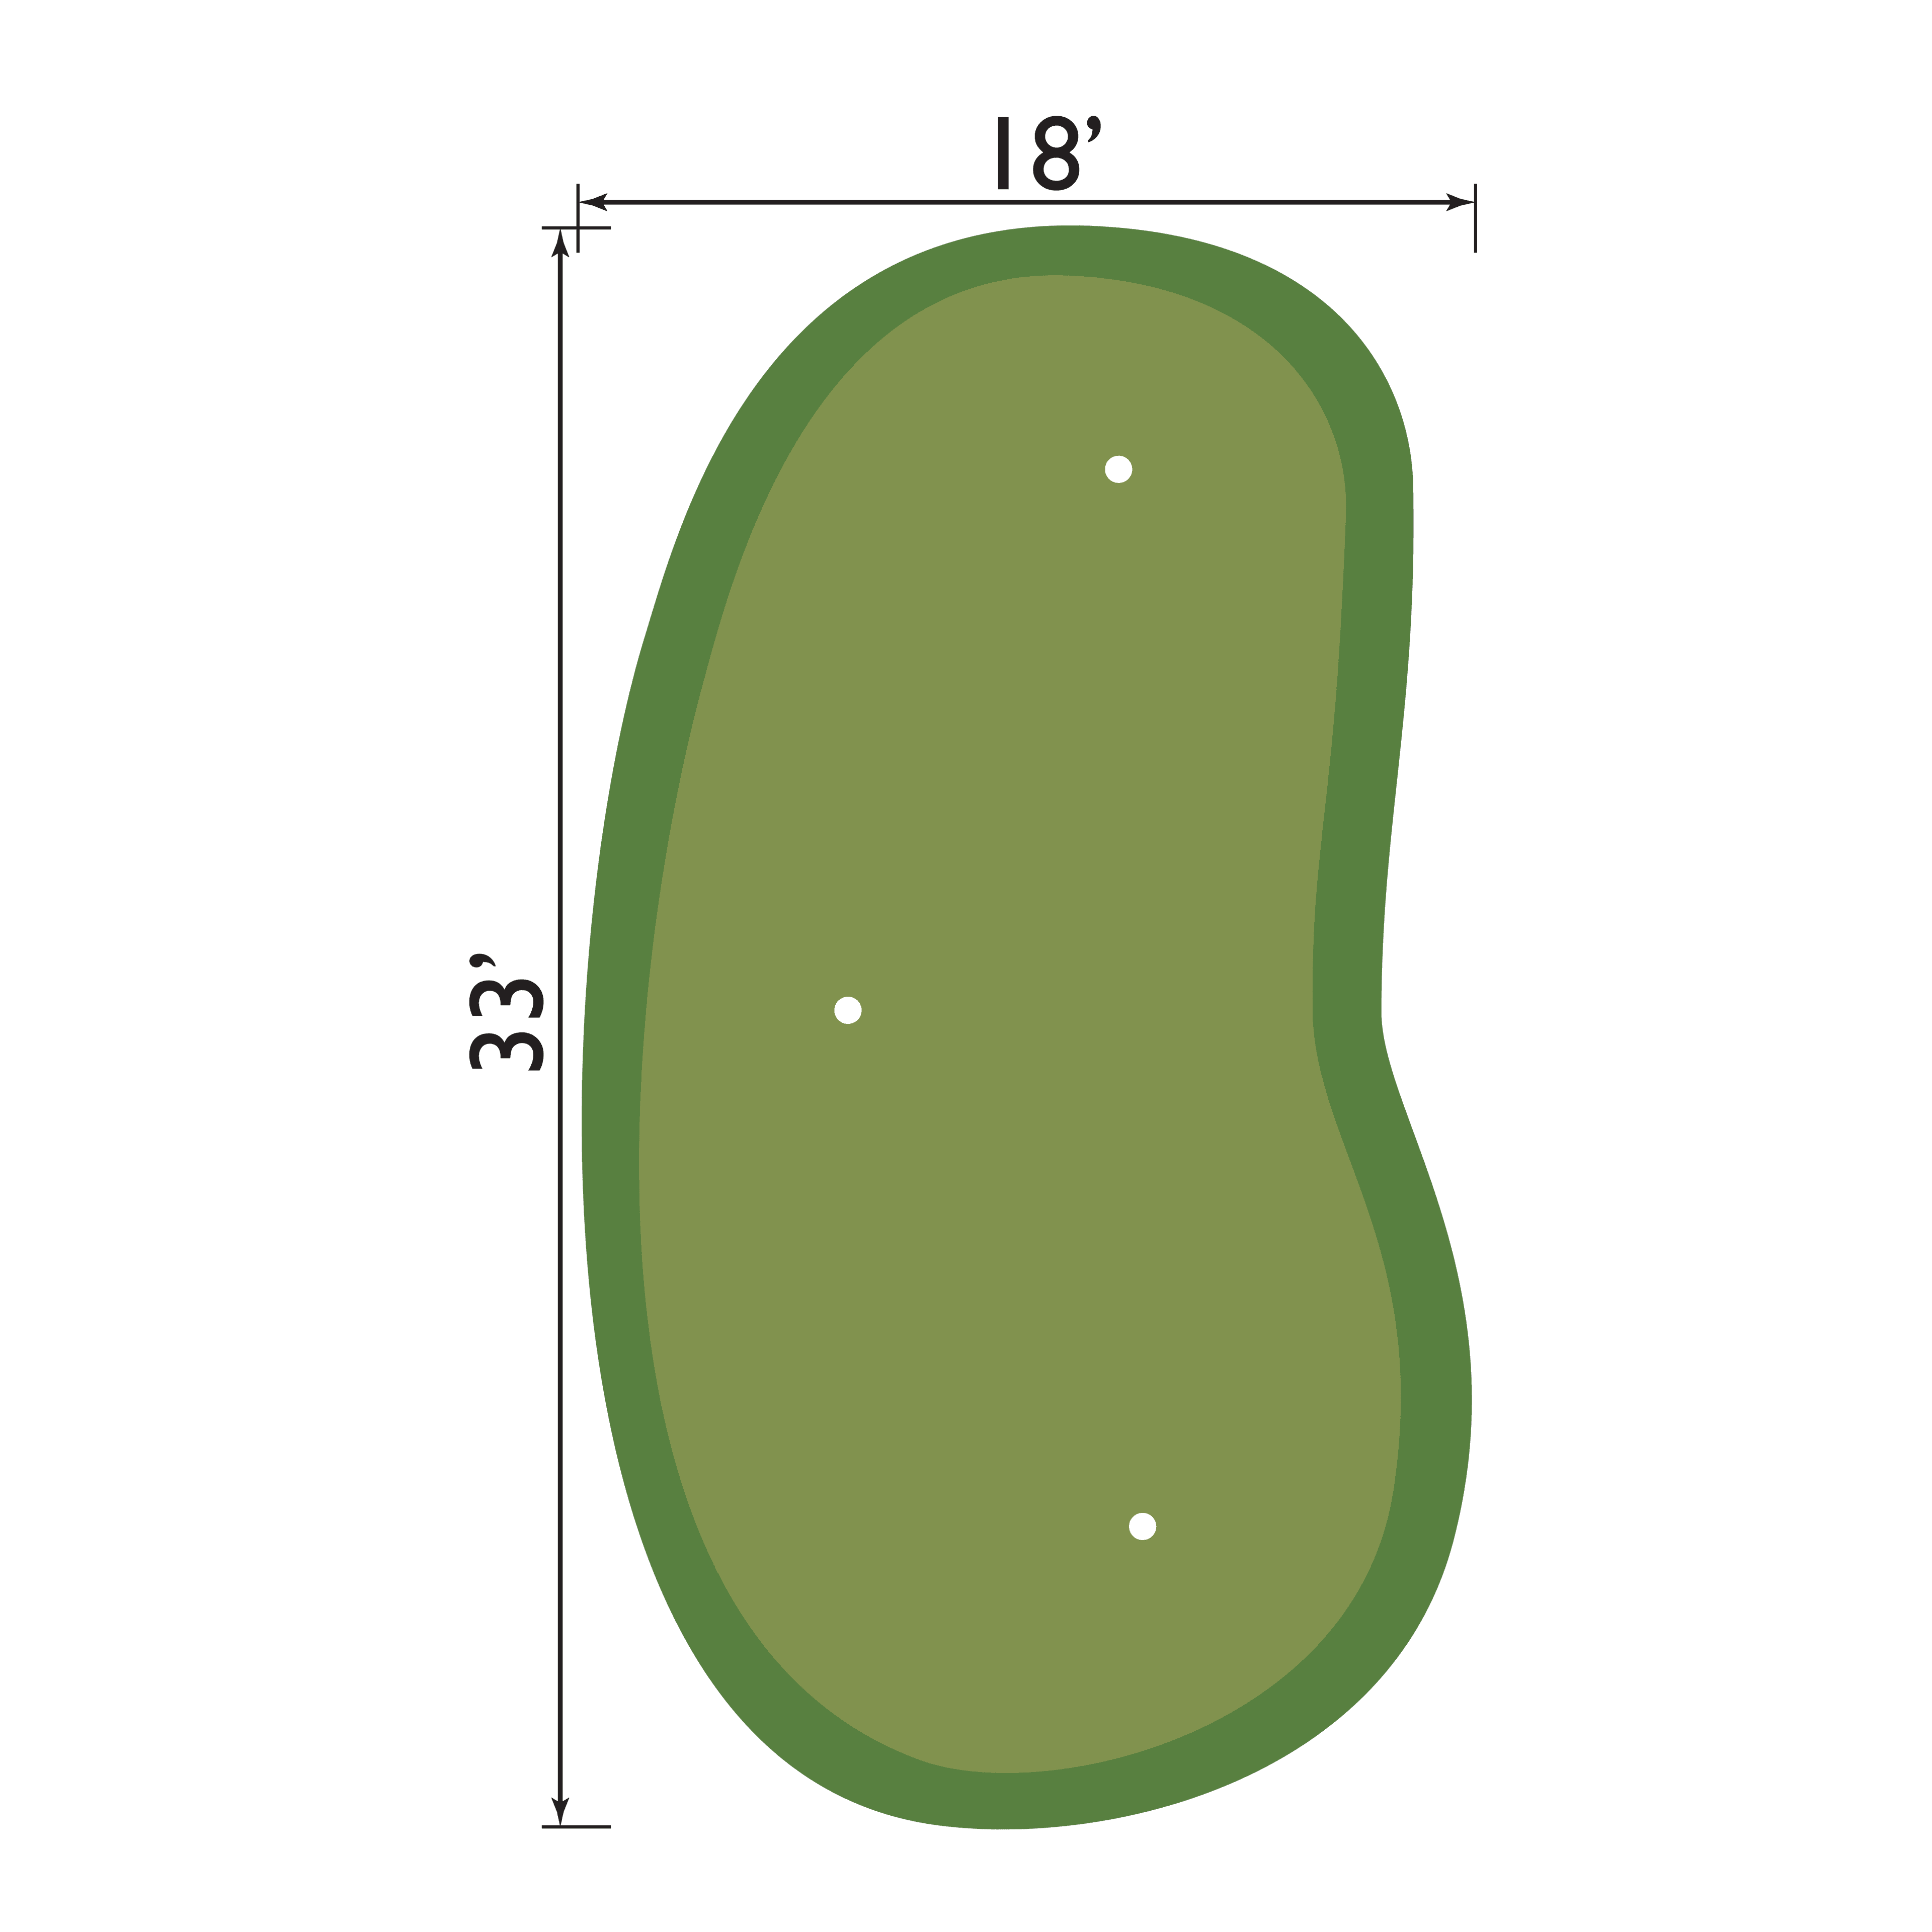
Backyard Putting Green
A mid-size residential putting green that offers a more immersive practice experience for home golfers. This kit balances playability and installation efficiency, making it a strong option for experienced installers and builders. The layout allows for a seamless putting surface, reducing installation risk compared to larger or more complex greens.
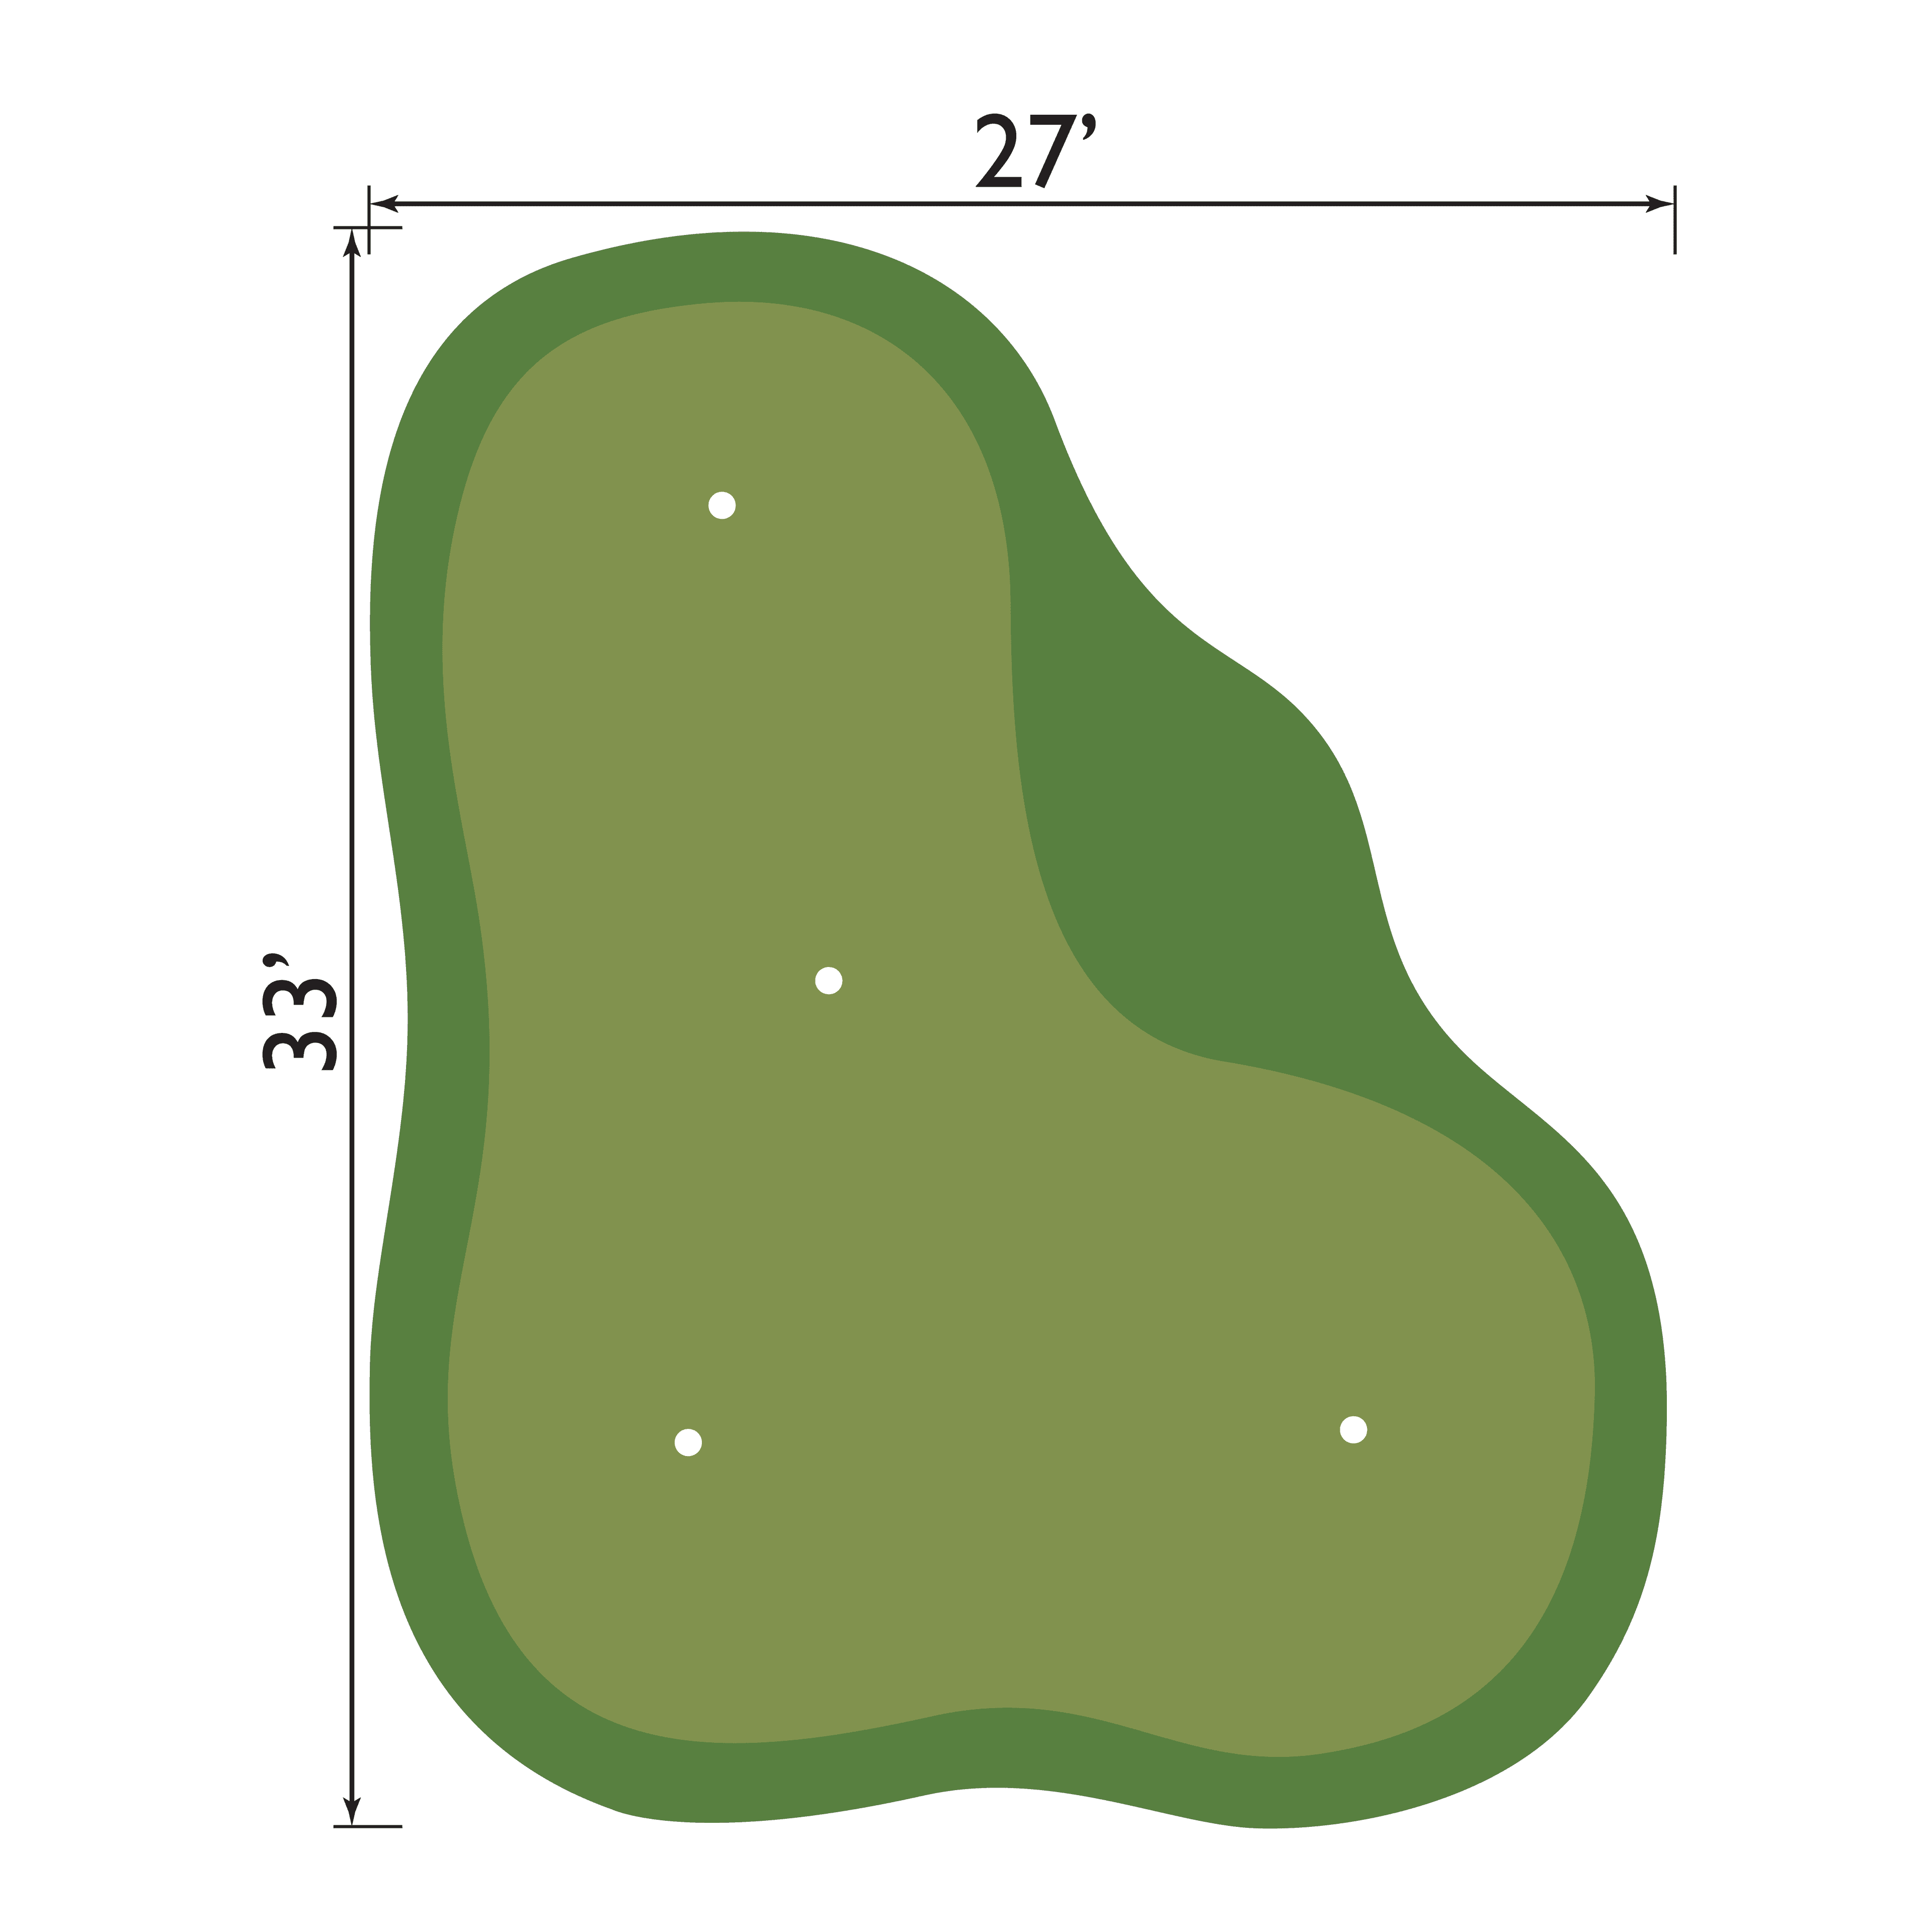
Short Game Green
A full-featured short-game practice environment designed to replicate real on-course conditions. This is the most complex DIY kit we offer and includes multiple turf sections that require precise seaming within the putting surface. It is intended for experienced installers or builders with a strong understanding of grading, layout, and precision construction.
What Our Customers Say
Real experiences from satisfied customers
Hello my name is Rhett Garner. I opened the nation's largest World Gym here in the great state of Arkansas. I was in the middle of multiple tasks but Jeremy Still and National Greens staff was phenomenal. He brought computer added drawings and and a time-line. They were finished in less than a week.

Rhett Garner
World gym
Jeremy Still provides personalized caring service with utmost quality. I have had the opportunity to work with him a lot and I can vouch for the fact that he is an expert at artificial greens. If you have any questions further regarding my experience with National Greens please call: 479-381-4944
Steve Jhonson
Bella Vista arkanas
Excellent quality! Looks like the 10th hole of a country club course! Owners are easy to work with, fast, and reliable. He is artistic in his design techniques and more than reasonable with his charges. I recommend this company. A golf course putting green!It has helped my game big time.
Danny Nutt,
OI MIss